Showing posts with label bacon. Show all posts

Tuesday, November 15, 2011

A Triumphant Return: Bacon-Wrapped Cornbread Stuffing Balls!

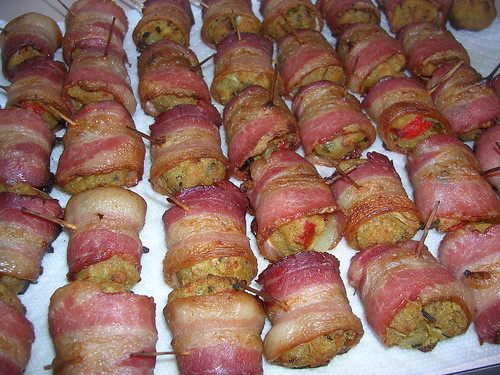
Folk(s), it has been way too long. But to make up for it, I'm pulling out what is quite possibly my most popular recipe to date: Bacon-Wrapped Cornbread Stuffing balls. Need I say more?

Naked Bacon Soldiers
Funny story: this picture was taken December 31st, 2010! The rest were taken November 2011.
The first step of any good cornbread stuffing is good cornbread crumbs. This is the second-most important ingredient, so you could buy your own (5c. sounds like a good amount) or you can make your own. This happens to be my favorite recipe (adapted from here):

Spiced Sweet Cornbread (make the day before)
  • 1 cup yellow cornmeal
  • 1 cup white flour
  • 1 cup milk
  • 1/3 cup white sugar
  • 1/3 cup honey
  • 1/3 cup oil*
  • 1 egg
  • 2 Tbsp ground cumin (adjust to taste)
  • 2 Tbsp ground chili powder
  • 2 tsp baking powder
  • 1 tsp salt
  • 1 tsp cayenne pepper (optional)
  • 1 Tbsp butter (optional)
Preheat oven to 400. If you have a cast iron skillet, preheat it in the oven as well. Otherwise, go and buy one while the oven is preheating.

In a medium sized mixing bowl stir together all ingredients except the butter until thoroughly mixed. When the cast iron is heated, add the butter and swirl around to coat the whole pan. Pour the batter in the pan and cook for 20-25 minutes. The cornbread should be dry but not burnt (if you don't use a cast iron skillet, increase the time by about 5 minutes; if you are making this recipe for anything other than crumbs, cut the time by about 5 minutes).

Once the bread has cooled a bit, place it in a bowl or cookie sheet, and crumble. I find a dough blender works really well for this. You could probably also use a food processor; I don't happen to have one. Leave out overnight to dry.

*To add a kick, used a spiced chili oil. I made mine using a handful of red Thai chilies with the stems cut off (keeping the seeds), simmered over low heat in about a quart of canola oil until bubbles began to form on the surface of the peppers. I removed from the heat, let cool to room temperature, then blended in a blender. Mine kept for over a year in a squeeze-top bottle in the fridge.

Grilled Vegetables (can be made the day before)
  • 2-3 mild peppers (red and green bell pepper, poblano, pasilla, etc.)
  • 1-2 spicy peppers (jalapeƱo; habanero if you are especially bold)
  • 1 medium onion
  • 1 tsp salt
Quarter the onion through the root, leaving the root intact. Remove any loose peels, but don't worry about getting every last one; they will likely burn off in the grill anyway.

Grill the (whole) peppers and (quartered) onions over high heat until the outsides are nice and charred.

Remove from heat. After the peppers are cooled, remove all peels, seeds, stems, etc. (You don't have to be perfect about removing all the charred bits — it adds flavor.). Mince all the vegetables and mix with the salt. Cover and store until needed.

The Day Of
  • ~16 pieces of thick cut bacon. The kind of bacon I like is 24oz for 16 pieces.
  • 2-3 eggs
Preheat oven to 325.

Stir together the cooled, grilled veggies with the  cornbread crumbs, then add eggs, one at a time until the mixture is moist, but not wet. The mix should be able to hold together when lightly pressed. Cut the bacon in half.
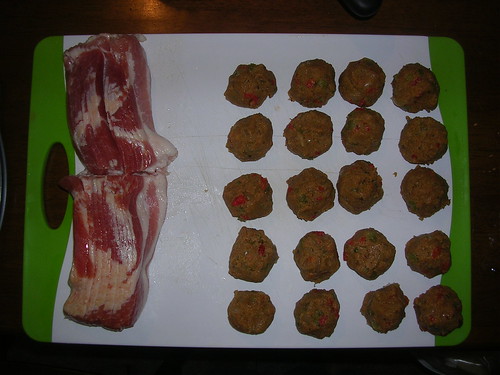
Naked Bacon Soldiers
Naked stuffing balls awaiting a tasty meat blanket

Using wetted hands, grab a small handful of the mix and very lightly press together to make golf ball-sized balls. Wrap each ball with a half slice of bacon, and set on a nonstick cookie sheet, seam side down. (You can also use toothpicks for a handy appetizer, but I find they stick together rather well without.)
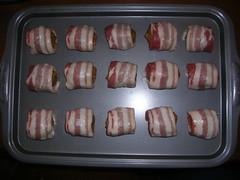
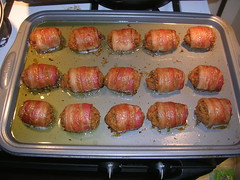
Bacon SoldiersBacon Soldiers
Before and after. It's magic!

Bake the balls for 45-60 minutes, checking and rotating every 10-15 minutes. When the bacon is firm but not crispy, and the cornbread is golden brown, they are done. Drain on paper towels, then enjoy! They are good hot or room temperature.
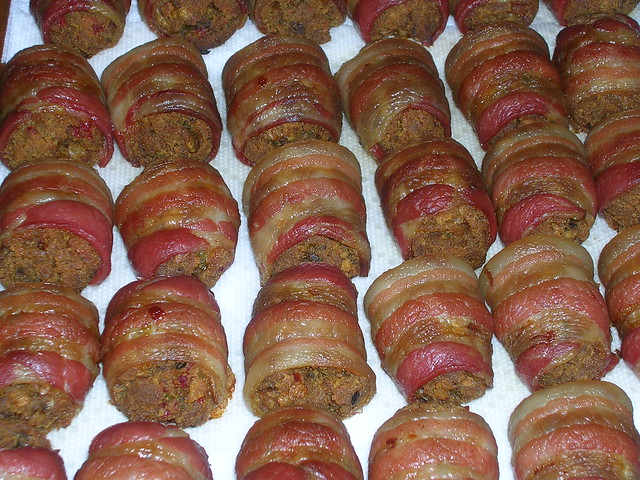
Bacon Soldiers

Thursday, July 15, 2010

Ice Cream Part I: Maple Pecan and Bacon

Last week's Foodie Fights was Battle Frozen Dessert! I did not get selected to participate, but it was enough to finally get me off my laurels and make some ice cream, something I've been wanting to do for a long time. So, after rewatching the Churn Baby Churn and Churn Baby Churn 2 episodes of Good Eats, I decided to set off and make Philadelphia style ice cream, (i.e. frozen cream and sugar) which seemed like the easiest type to attempt for my first... attempt.

But what kind? Well, I've always had a love affair with bacon, and lately I've been semi-successfully incorporating it into sweet desserts, so why not ice cream? Another combination I really love is pecans and bacon, and maple and pecans, and guess what? I just so happened to have in the fridge some fresh, B-grade maple syrup my brother's girlfriend made, so I figured it was destiny.

Maple Bacon and Pecan Ice Cream
  • 4 cups (1 qt) half and half
  • 2 cups (1 pt) heavy cream
  • 1 1/2 cups brown sugar
  • 1/4 cup maple syrup (B-grade is better for this as it has a richer flavor and is less sweet; whatever you do, don't use maple flavored syrup.)
  • 1 tsp cinnamon
  • 1/2 tsp ground nutmeg
  • 1/2 tsp ground clove
  • 1 tsp vanilla extract
 Slowly heat all ingredients except the vanilla to 170F (or if you don't have a thermometer, heat it until you see one single bubble), then cool slightly and add the vanilla. Place in an air-tight container and store in the refrigerator. You need it to at least get down to fridge temp, but it will be even better if you keep it overnight.

  • 1 1/2 cups (6 oz) pecan pieces
  • 2 Tbsp butter
  • 3 Tbsp white sugar
  • 1 tsp cinnamon
  • 1/2 tsp ground nutmeg
  • 1/2 tsp ground clove
  • 2 Tbsp maple syrup
Melt the butter over low heat. Just when it starts to brown add the pecans, stirring often. (This is when the professional chef flippy technique comes in handy; using a spoon just kinda lands nuts everywhere). Cook for about 5 minutes, or until the nuts are well toasted. Be careful as it's easy to burn them, and nobody likes burnin' their nuts! (Sorry, couldn't help myself).

Add the spices and sugar, stirring and/or flipping to evenly coat, then spoon in your maple syrup. Keep everything moving until you have a big sticky mass of pecans and yum, then spread out on parchment paper to cool.

  • Bacon!
I used 7 pieces (3.5 oz? I have no idea) maple-cured bacon and it seemed to be the perfect ratio of bacon to non-bacon in the final product. Lay the bacon out on a foil-lined pan and heat slowly (300-ish) until the fat is rendered and it's nice and crispy. The particular brand of bacon I used was sweet but not salty, so I added a healthy pinch or two of salt before baking. Crumble into pecan-sized pieces, then place the bacon and pecans in plastic bags to await ice cream day.

Ice cream day!

Dump your ice cream base into your favorite ice cream maker. Mine's pretty big sized, so if you only have a 1 qt machine you may have to do it in two batches. After about half the time (15 minutes for me) add the pecans and bacon. When it's soft serve consistency (or when your machine (if electric) or slave (if manual) starts making whining noises), quickly (if you're making ice cream it's probably hot outside!) scoop into a freezer-safe container and freeze for a couple hours. Then the best part: eat it!

After scarfing down way too much of this stuff, I found out that it's even better (if you can believe it) covered in chocolate syup. And I don't generally like chocolate syrup.

Enjoy!

After thoughts

 There is one little detail I didn't mention above. When I was heating my milk, it started to look like overcooked cheese soup. Oh noes! Brown sugar (and possibly maple syrup) are pretty acidic, and acids denature milk proteins, causing milk to look like overcooked cheese soup. I did some research on the subject (even finding a nifty food science book on the internet), but don't really know how to avoid this problem. The only thing I found was perhaps if you heat the milk before you add the sugar, the rate of curdling should slow down. But I haven't tried it yet. The final product turned out more than excellent, so it ended up not being a problem. Guess I'll just have to make several more batches and experiment!

Tuesday, June 29, 2010

Mac & Cheese: The Formula

As a kid I never really liked macaroni and cheese. The stuff in the blue box just never did it for me, and for a long time I thought that's what mac & cheese was supposed to taste like. And then one day I had the real stuff; that was the day my lifespan decreased by a decade or so. But it's probably worth it now that I know the amazingness which is mac & cheese.

Oh and bonus, it's super easy to remember the recipe, since everything is in amounts of 2.

Basic Macaroni & Cheese
  • 2 c. macaroni (or any small pasta you have in your pantry)
  • 2 Tbsp butter
  • 2 Tbsp flour
  • 2 c. milk
  • 2 c. sharp cheddar cheese
Cook macaroni in salted water until almost al dente.

In the mean time, melt butter in 10-inch oven-safe saute pan (I love my cast iron pan for this), then add flour. Stir for about a minute to cook out the starchy taste, then slowly add the milk, stirring constantly. Let the mixture simmer until it gets thick. Add the cheese, stirring until melted, then season well with salt and pepper (I like lots of pepper). Stir in the cooked and drained pasta, then pop into the oven for about 10-15 minutes. (I also like to add a cup of cheese to the top, but it doesn't fit into my nifty little 2 pattern.) Serves 2 as a meal (...or 1 if you are really hungry) or 4 as a side.

The variations

The great thing about this recipe is it's so easy to adapt. You can use the butter to saute vegetables or meats (mmm.... bacon) then add your flour straight to the sauteed stuff. Proceed along the rest of the recipe as normal. Some combinations I've made:
  • Bacon. I guess it's not a combination so much but bacon makes anything better. The first mac & cheese I made myself had bacon and instead of cooking it in the oven I used the smoker. Love.
  • Bacon, onion, mushroom: like above, but for the sophisticated pallet. 
  • Grilled corn, peppers, onions make a nice summer side dish.
  • Hot dogs, chili, mustard and onions make chili dog mac & cheese. Oh. My. Goodness.
  • Chorizo, red pepper, onion, cumin, hot sauce, for a mexican flair.

Friday, May 21, 2010

Scallops Linguine with Bacon, Mushrooms and Peas in a Mustard Cream Sauce

 So the name doesn't roll off the tongue but this is still a pretty tasty dish.

Linguine
  • 6 oz Linguine
As you prepare the rest of the food boil the linguine in your biggest pot with a large pinch of water. You know how to cook pasta, right?

Scallops et al.
  • 2 strips bacon, cut into lardons (tiny little strips)
  • 1/4 white onion, diced
  • 3-4 large button mushrooms, diced
  • 6 oz bay scallops
  • 1/4 cup frozen peas (fresh or frozen; not canned)
  • Salt and pepper
Saute the bacon in a stainless steel pan. (Ok, you can use non-stick, and I won't tell if you do, but technically your sauce won't be as tasty.) When it's nice and crispy, drain onto paper towels. Drain excess grease and add the onion and mushrooms; saute until soft. Next add the scallops; cook for about 30 seconds to a minute then add the peas, salt and pepper. As soon as the scallops are cooked through (it won't take long), add the bacon back to the pan and move everything to a bowl while you make the sauce.

Mustard Cream Sauce
  • 1 cup white wine
  • 2 cups chicken stock (I cheated here and used a white wine- and herb-infused chicken stock)
  • 2 Tbsp whole-grain mustard
  • 2 Tbsp parmesan cheese
  • 2 Tbsp heavy cream
Deglaze the pan with the white wine, scraping all the yummy bits off the bottom. Add the stock and keep over medium-high heat until reduced to about 1/3. It should thicken to coat the back of a spoon. Add the mustard, cheese, and cream, and stir over heat until well blended.

Toss together the linguine, sauce, and scallop mixture, and enjoy.