Last week's
Foodie Fights was
Battle Frozen Dessert! I did not get selected to participate, but it was enough to finally get me off my laurels and make some ice cream, something I've been wanting to do for a long time. So, after rewatching the
Churn Baby Churn and
Churn Baby Churn 2 episodes of Good Eats, I decided to set off and make Philadelphia style ice cream, (i.e. frozen cream and sugar) which seemed like the easiest type to attempt for my first... attempt.
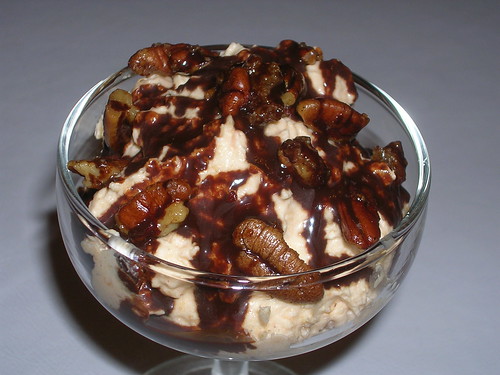
But what kind? Well, I've always had a love affair with bacon, and lately I've been semi-successfully incorporating it into sweet desserts, so why not ice cream? Another combination I really love is pecans and bacon, and maple and pecans, and guess what? I just so happened to have in the fridge some fresh, B-grade maple syrup my brother's girlfriend made, so I figured it was destiny.
Maple Bacon and Pecan Ice Cream
- 4 cups (1 qt) half and half
- 2 cups (1 pt) heavy cream
- 1 1/2 cups brown sugar
- 1/4 cup maple syrup (B-grade is better for this as it has a richer flavor and is less sweet; whatever you do, don't use maple flavored syrup.)
- 1 tsp cinnamon
- 1/2 tsp ground nutmeg
- 1/2 tsp ground clove
- 1 tsp vanilla extract
Slowly heat all ingredients except the vanilla to 170F (or if you don't have a thermometer, heat it until you see one single bubble), then cool slightly and add the vanilla. Place in an air-tight container and store in the refrigerator. You need it to at least get down to fridge temp, but it will be even better if you keep it overnight.
- 1 1/2 cups (6 oz) pecan pieces
- 2 Tbsp butter
- 3 Tbsp white sugar
- 1 tsp cinnamon
- 1/2 tsp ground nutmeg
- 1/2 tsp ground clove
- 2 Tbsp maple syrup
Melt the butter over low heat. Just when it starts to brown add the pecans, stirring often. (This is when the professional chef flippy technique comes in handy; using a spoon just kinda lands nuts everywhere). Cook for about 5 minutes, or until the nuts are well toasted. Be careful as it's easy to burn them, and nobody likes burnin' their nuts! (Sorry, couldn't help myself).
Add the spices and sugar, stirring and/or flipping to evenly coat, then spoon in your maple syrup. Keep everything moving until you have a big sticky mass of pecans and yum, then spread out on parchment paper to cool.
I used 7 pieces (3.5 oz? I have no idea) maple-cured bacon and it seemed to be the perfect ratio of bacon to non-bacon in the final product. Lay the bacon out on a foil-lined pan and heat slowly (300-ish) until the fat is rendered and it's nice and crispy. The particular brand of bacon I used was sweet but not salty, so I added a healthy pinch or two of salt before baking. Crumble into pecan-sized pieces, then place the bacon and pecans in plastic bags to await ice cream day.
Ice cream day!
Dump your ice cream base into your favorite ice cream maker. Mine's pretty big sized, so if you only have a 1 qt machine you may have to do it in two batches. After about half the time (15 minutes for me) add the pecans and bacon. When it's soft serve consistency (or when your machine (if electric) or slave (if manual) starts making whining noises),
quickly (if you're making ice cream it's probably hot outside!) scoop into a freezer-safe container and freeze for a couple hours. Then the best part: eat it!
After scarfing down way too much of this stuff, I found out that it's even better (if you can believe it) covered in chocolate syup. And I don't generally like chocolate syrup.
Enjoy!
After thoughts
There is one little detail I didn't mention above. When I was heating my milk, it started to look like overcooked cheese soup. Oh noes! Brown sugar (and possibly maple syrup) are pretty acidic, and acids denature milk proteins, causing milk to look like overcooked cheese soup. I did some research on the subject (even finding a
nifty food science book on the internet), but don't really know how to avoid this problem. The only thing I found was perhaps if you heat the milk before you add the sugar, the rate of curdling should slow down. But I haven't tried it yet. The final product turned out more than excellent, so it ended up not being a problem. Guess I'll just have to make several more batches and experiment!
