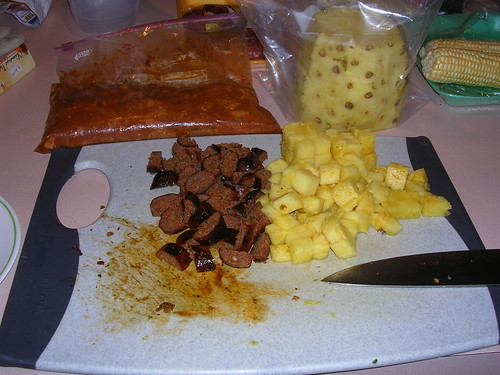
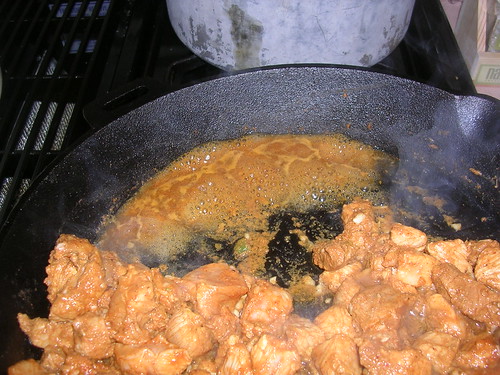
Sunday, October 10, 2010

Carrot Cheesecake!

I love cheesecake, and it's one of those things you you can make without searching for a recipe or trying really hard, which makes it great for an impulsive dessert. It's also a really easy dessert to customize. This week I was craving carrot cake with cream cheese icing, but that would require a recipe and I'd get flour all over the place and really I was just too lazy for all that. Thus the carrot cheesecake was born.

Graham Cracker Crust
  • Graham crackers (um.... I forgot to count. Let's say 12-ish)
  • Cold, unsalted butter (yeah, failed to measure this one too. I'll call it 3 Tbsp. Ish.)
  • 2 Tbsp. sugar. Or so.
Place all ingredients into a food processor and obliterate until it looks crusty. There should be enough butter so that it holds together when pressed, and enough grahams to cover the bottom of an 8-inch springform pan. You can't really mess this up, so just adjust as you go. Note that a lot of crust recipes require you to melt the butter first, but what happens when you add a liquid to a graham? You get mud. I dunno bout you, but I'm not a fan of mudcrust.

Press the crust into the bottom of your pan and bake at 350 for about 7 minutes. Set to cool while you do the rest.

Carrot Filling
  • 2 cups shredded carrots (about 4 carrots worth)
  • 1 cup apple juice
  • 1/2 cup raisins
  • 2-3 pieces candied ginger, minced (about 1Tbsp)
  • 2 Tbsp brown sugar
  • 1/2 Tbsp ground cinnamon
  • 1 tsp each fresh grated nutmeg and ground allspice
  • 1/4 tsp ground clove
  • Tiny pinch salt
Place all ingredients in a 1-quart pot and simmer over low heat for 10-15 minutes, or until all juice is absorbed/evaporated and carrots are no longer crunchy. If the liquid boils away before the carrots are done, add more 1/2 cup at a time. Adjust the spices to taste, then set aside to cool.

Cheesecake Base
  • 2 packages (8 oz. each) cream cheese at room temperature
  • 4 eggs
  • 3/4 cup sugar
  • 1 tsp vanilla
  • 1/2 cup toasted walnut pieces
  • 1/2 cup toasted pecan pieces
 In a large bowl, blend the cream cheese until thoroughly soft. Add the eggs, sugar, vanilla and blend on low speed. Add the carrot mixture and the nuts and blend to combine. Pour the batter onto the crust then bake for about 35 minutes or until all but the center-most 2-inches is firm.

Note: contrary to many other theories going around, cracking is caused by overcooking. Since the cake cools from the outside in, and since it holds heat for a long time, cooking it until the middle is just underdone will allow the cake to coast to a perfect finish.

But then again if it does crack, just eat that one all yourself and make another one to show off to others :)

Monday, August 16, 2010

Banana-Tamarind Spring rolls with Coconut Ice Cream and Caramel Sauce

Battle Tamarind and Brown Sugar!

Tamarind is something that I associate with Thai food, so I decided to try a dish inspired by my one of my favorite Thai desserts, the fried banana. It all starts with...

Coconut Ice Cream

If you can't tell yet, I'm a gigantic fan of coconut milk. I could drink it straight, but that's generally frowned upon. So let's freeze it instead!
  • 6 egg yolks
  • 1 cup sugar
  • 1 tsp vanilla
  • Big ol' pinch of salt
  • 2 cans (27 total ounces), unsweetened coconut milk
 In a large bowl, whisk together egg yolks, sugar, vanilla, and salt until thoroughly combined. Slowly whisk in the coconut milk, then transfer to a 2 quart pot over medium-low heat, stirring constantly. Heat the mixture until it reaches 180 degrees Fahrenheit (or until it thickens enough to coat the back of the spoon; it should give off whisps of steam, but not be boiling), then put into a container to chill for a minimum of 4 hours (overnight is best).

Freeze the mixture using the directions on your ice cream machine. This recipe might be a little big for smaller tabletop ice cream makers; after overrun (air incorporation) I had about a quart and a half of ice cream.

Caramel Sauce

A little word of warning: I make caramel sauce the hard way (because I'm lazy and it takes fewer steps). If you are fast and loose in the kitchen you can use these directions, otherwise this looks like a great recipe which will get you similar results.

  • 8 Tbsp unsalted butter*
  • 3/4 c. brown sugar
  • pinch of salt
  • ~1/3 cup milk*
  • 1 tsp vanilla
Melt butter over medium heat, then add the brown sugar and salt. Whisk constantly until sugar is completely dissolved and starts to foam up. Carefully and slowly add the milk, while whisking like a mad (wo)man. I generally add a splash, whisk like mad, add another splash, whisk again, etc. until it looks about right. You want a smooth, thick sauce that has a nice sheen to it. Don't forget that the sauce will thicken as it cools, so don't make it too thick to start out.

*I never have heavy cream on hand, and it's too expensive to buy a pint just to use a couple tablespoons. If you do happen to have it on hand, you can cut the butter and use heavy cream instead of milk. Otherwise, the added butter is needed to keep the milk proteins from curdling.

Banana-Tamarind Spring Rolls

A while back I decided to make Pad Thai, and the recipe I used needed 1 Tbsp of tamarind concentrate. Since then I've used exactly 0 of the stuff, so I'm glad to finally get some use out of it!


DSCN1588


The night before
  • 2  bananas, diced (quarter the banana along the length then slice)
  • 1/3 cup tamarind concentrate
  • 2 Tbsp brown sugar
Mix together all ingredients and store in fridge overnight.

The day of
  • 32-ish wonton wrappers or 8-ish spring roll or egg roll wrappers.
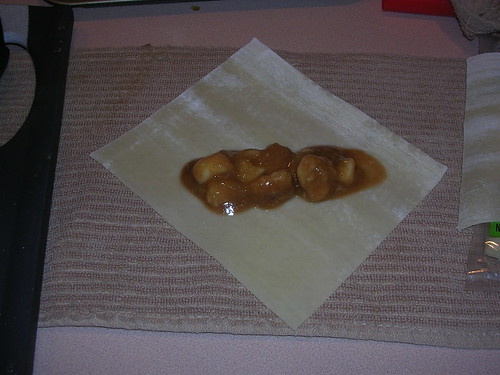
This is the easy part or the hard part, depending on your skill level. As a midwestern White suburban American, I have little to no experience in making wrapped/rolled/stuffed foods so mine always turn out... interesting. I played around with wontons vs. spring rolls, and ended up choosing the latter. The wontons probably have a better ratio of inside stuff to outside stuff, but I couldn't make them without making a huge mess, and it was sometimes hard to get enough filling inside.

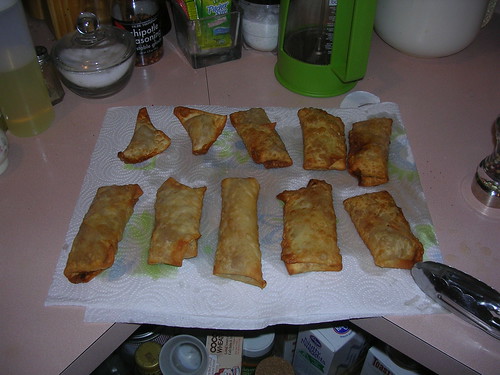
Anyways, fill your skins with an appropriate amount of filling (I didn't have any problems with air bubbles expanding and popping, but the marinade oozes out when you are trying to close it), then seal with water (or the leftover egg whites from the ice cream recipe). Fry at 350F until golden brown. I got criticized last time for my lack of photography, so here are some action shots (side note, my camera now has cooking oil, egg whites, and tamarind sauce all over it):


DSCN1583
(Notice my misshapen wrappers)

DSCN1584
(Notice my misshapen egg rolls)


Serving

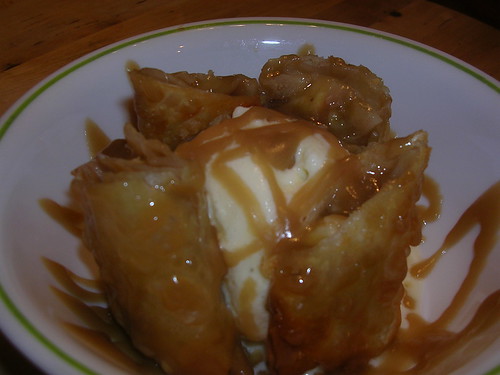
To serve, place a big ol' scoop of the ice cream in a bowl, slice two spring rolls in half (or use four wontons) and place fancily around the outside, then drizzle everything with brown sugar. Pretend that because it has fruit it must be good for you, and eat a second serving as well :)


DSCN1587

Monday, August 2, 2010

Asian Peppered Cucumber Salad

It's that time again, FoodieFights Battle Cucumber and Black Pepper. This week I've decided to go with something I hardly ever do: a side dish. Not only that, but it's a vegetarian side dish. Hold on to your hats people, as I bring you:

Asian Peppered Cucumber Salad
  • 1 medium to large cucumber, skin on
  • 1 small clove garlic, grated or very finely minced
  • 1 tsp fresh ginger, grated or finely minced
  • 2 Tbsp soy sauce
  • 2 Tbsp honey
  • 2 Tbsp rice wine vinegar
  • 2 Tbsp sweet Thai chili sauce
  • 2 Tbsp olive oil
  • Bunches o' fresh cracked black pepper
  • 1 scallion, thinly sliced
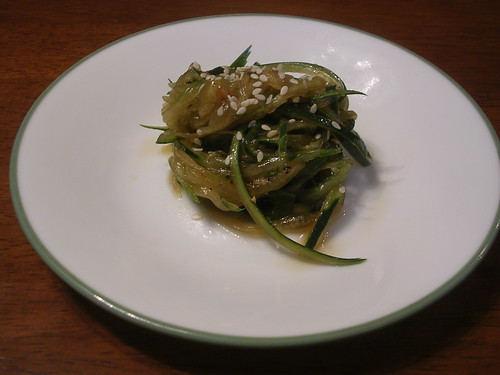
 Thinly slice the cucumber, or, if you are lucky enough to have a nifty attachment to your mandolin, slice into very fine strips, as shown in the picture below. If using the mandolin, avoid the seedier areas of the cucumber, because you might get mugged. Also, they mostly just smash up instead of slicing nicely. Place the strips or slices in a colander for about a half hour to drain any excess moisture.

In a medium-sized bowl, whisk together all the other ingredients except the scallions. The mixture should be salty (from the soy), sweet (honey, chili sauce), tangy (vinegar) and spicy (chili sauce, pepper), but not too much of each. I didn't measure how much pepper I added, but it was quite a bit; you want enough to have a distinct flavor. Add the scallions and cucumber and let the whole mixture marinate for a few hours or overnight.

Note: there is a pretty generous marinade/cucumber mixture, which leads to an intensely flavored, but somewhat saucy, end product. If you wanted to keep the flavor, just drain off the extra marinade before serving (it could, perhaps, be used as a stir fry sauce base). Otherwise you can cut the marinade in half, or, if you've been making the recipe as you read and have just now gotten to this part, add another cucumber. Either way, it should still taste wonderful.


Asian peppered cucumber salad
(Biggie Size Me)

Serving

Since it's a side dish, I though I might contemplate what this cucumber salad should go along with.The dish has a very bright flavor, which would pair nicely with a fatty Asian pork (Chinese spareribs?) or duck (Peking duck?) dish. It also, despite the heat from the chili sauce, has a nice cooling effect which would go nicely to calm down a spicy Szechuan beef. And of course, let's not forget about sushi! Or you could do what I did and just enjoy it by itself. Anyway you slice it (get it? Because you can sliced in slices or... oh nevermind), I think you'll enjoy it.

Monday, July 19, 2010

Sweet Potato Mousse with Espresso Chocolate Sauce

This week's FoodieFights is Battle Sweet Potato and Coffee. It's a tough battle for me, because while I love sweet potatoes, I hate coffee. In fact, before creating this recipe, I've never even made a cup of coffee before. So my challenge today wasn't so much how to combine sweet potatoes with coffee (I immediately had several ideas) but how to combine them into something that I would actually eat. After considering several ideas, I decided to go with a dessert. After all, most new coffee drinkers drown their coffee with sugar and cream, right?

Sweet Potato Mousse
  • 1 sweet potato (about 8 oz), peeled and diced
  • 2 oz. cream cheese
  • 1/2 c. powdered sugar
  • 1 tsp vanilla
  • 1 tsp ground cinnamon
  • 1/2 tsp fresh ground nutmeg
  • 1/2 tsp ground clove
  • 1 cup heavy cream, very cold
Cook the sweet potato in salted boiling water, then drain well and chill. Once the potatoes are nice and cold, add the cream cheese, powdered sugar, vanilla, and spices. Beat on very low speed until combined, then ramp up the speed and beat until smooth and slightly fluffy.

Next, beat the heavy cream until it attains a medium firmness. If you overbeat here, then in the next step you will make sweet potato butter. It actually sounds like that might be tasty, but it's not what we're going for. Fold in about a third of your whipped cream with you sweet potato to lighten it up, then throw the sweet potato back into the whipped cream. Fold well, then whip again at medium speed until it attains a nice mousse-y firmness. Chill in the fridge while you make the...

Espresso Chocolate Sauce
  • 1/2 cup sugar
  • 1/2 cup cocoa powder
  • 1 healthy pinch of salt
  • 1 cup fresh hot espresso (or double-strength coffee)
  • 1 tbsp coffee liqueur
In a small saucepan, whisk together the dry ingredients, then slowly whisk in the espresso and liqueur. I've found that if you whisk it into a paste then slowly add more liquid it keeps you from having chunks of undissolved bits of chocolate. Heat the mixture slowly. Boil for about a minute, then let cool. It should thicken as it cools, becoming the consistency of bottled chocolate syrup.


The Reveal

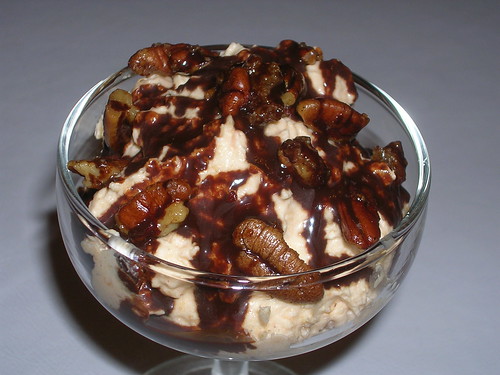
All you really need to serve this is a spoon for the mousse and a big bowl of sauce, but if you plan on serving this to someone instead of eating it all yourself, it's not hurt by a nice sprinkling of candied pecans:

Sweet Potato Mousse with Espresso Chocolate Sauce


The dessert as a whole is really quite a trip. You are immediately hit with the smokiness of the coffee, which I'm not supposed to like, but I'm surprised to find that I love it. Next comes the creaminess of the mousse with a delicate but definite hit of sweet potato, and it's rounded out with the deep, dark sweetness of chocolate.

Thursday, July 15, 2010

Ice Cream Part I: Maple Pecan and Bacon

Last week's Foodie Fights was Battle Frozen Dessert! I did not get selected to participate, but it was enough to finally get me off my laurels and make some ice cream, something I've been wanting to do for a long time. So, after rewatching the Churn Baby Churn and Churn Baby Churn 2 episodes of Good Eats, I decided to set off and make Philadelphia style ice cream, (i.e. frozen cream and sugar) which seemed like the easiest type to attempt for my first... attempt.

But what kind? Well, I've always had a love affair with bacon, and lately I've been semi-successfully incorporating it into sweet desserts, so why not ice cream? Another combination I really love is pecans and bacon, and maple and pecans, and guess what? I just so happened to have in the fridge some fresh, B-grade maple syrup my brother's girlfriend made, so I figured it was destiny.

Maple Bacon and Pecan Ice Cream
  • 4 cups (1 qt) half and half
  • 2 cups (1 pt) heavy cream
  • 1 1/2 cups brown sugar
  • 1/4 cup maple syrup (B-grade is better for this as it has a richer flavor and is less sweet; whatever you do, don't use maple flavored syrup.)
  • 1 tsp cinnamon
  • 1/2 tsp ground nutmeg
  • 1/2 tsp ground clove
  • 1 tsp vanilla extract
 Slowly heat all ingredients except the vanilla to 170F (or if you don't have a thermometer, heat it until you see one single bubble), then cool slightly and add the vanilla. Place in an air-tight container and store in the refrigerator. You need it to at least get down to fridge temp, but it will be even better if you keep it overnight.

  • 1 1/2 cups (6 oz) pecan pieces
  • 2 Tbsp butter
  • 3 Tbsp white sugar
  • 1 tsp cinnamon
  • 1/2 tsp ground nutmeg
  • 1/2 tsp ground clove
  • 2 Tbsp maple syrup
Melt the butter over low heat. Just when it starts to brown add the pecans, stirring often. (This is when the professional chef flippy technique comes in handy; using a spoon just kinda lands nuts everywhere). Cook for about 5 minutes, or until the nuts are well toasted. Be careful as it's easy to burn them, and nobody likes burnin' their nuts! (Sorry, couldn't help myself).

Add the spices and sugar, stirring and/or flipping to evenly coat, then spoon in your maple syrup. Keep everything moving until you have a big sticky mass of pecans and yum, then spread out on parchment paper to cool.

  • Bacon!
I used 7 pieces (3.5 oz? I have no idea) maple-cured bacon and it seemed to be the perfect ratio of bacon to non-bacon in the final product. Lay the bacon out on a foil-lined pan and heat slowly (300-ish) until the fat is rendered and it's nice and crispy. The particular brand of bacon I used was sweet but not salty, so I added a healthy pinch or two of salt before baking. Crumble into pecan-sized pieces, then place the bacon and pecans in plastic bags to await ice cream day.

Ice cream day!

Dump your ice cream base into your favorite ice cream maker. Mine's pretty big sized, so if you only have a 1 qt machine you may have to do it in two batches. After about half the time (15 minutes for me) add the pecans and bacon. When it's soft serve consistency (or when your machine (if electric) or slave (if manual) starts making whining noises), quickly (if you're making ice cream it's probably hot outside!) scoop into a freezer-safe container and freeze for a couple hours. Then the best part: eat it!

After scarfing down way too much of this stuff, I found out that it's even better (if you can believe it) covered in chocolate syup. And I don't generally like chocolate syrup.

Enjoy!

After thoughts

 There is one little detail I didn't mention above. When I was heating my milk, it started to look like overcooked cheese soup. Oh noes! Brown sugar (and possibly maple syrup) are pretty acidic, and acids denature milk proteins, causing milk to look like overcooked cheese soup. I did some research on the subject (even finding a nifty food science book on the internet), but don't really know how to avoid this problem. The only thing I found was perhaps if you heat the milk before you add the sugar, the rate of curdling should slow down. But I haven't tried it yet. The final product turned out more than excellent, so it ended up not being a problem. Guess I'll just have to make several more batches and experiment!

Tuesday, June 29, 2010

Mac & Cheese: The Formula

As a kid I never really liked macaroni and cheese. The stuff in the blue box just never did it for me, and for a long time I thought that's what mac & cheese was supposed to taste like. And then one day I had the real stuff; that was the day my lifespan decreased by a decade or so. But it's probably worth it now that I know the amazingness which is mac & cheese.

Oh and bonus, it's super easy to remember the recipe, since everything is in amounts of 2.

Basic Macaroni & Cheese
  • 2 c. macaroni (or any small pasta you have in your pantry)
  • 2 Tbsp butter
  • 2 Tbsp flour
  • 2 c. milk
  • 2 c. sharp cheddar cheese
Cook macaroni in salted water until almost al dente.

In the mean time, melt butter in 10-inch oven-safe saute pan (I love my cast iron pan for this), then add flour. Stir for about a minute to cook out the starchy taste, then slowly add the milk, stirring constantly. Let the mixture simmer until it gets thick. Add the cheese, stirring until melted, then season well with salt and pepper (I like lots of pepper). Stir in the cooked and drained pasta, then pop into the oven for about 10-15 minutes. (I also like to add a cup of cheese to the top, but it doesn't fit into my nifty little 2 pattern.) Serves 2 as a meal (...or 1 if you are really hungry) or 4 as a side.

The variations

The great thing about this recipe is it's so easy to adapt. You can use the butter to saute vegetables or meats (mmm.... bacon) then add your flour straight to the sauteed stuff. Proceed along the rest of the recipe as normal. Some combinations I've made:
  • Bacon. I guess it's not a combination so much but bacon makes anything better. The first mac & cheese I made myself had bacon and instead of cooking it in the oven I used the smoker. Love.
  • Bacon, onion, mushroom: like above, but for the sophisticated pallet. 
  • Grilled corn, peppers, onions make a nice summer side dish.
  • Hot dogs, chili, mustard and onions make chili dog mac & cheese. Oh. My. Goodness.
  • Chorizo, red pepper, onion, cumin, hot sauce, for a mexican flair.

Sunday, May 30, 2010

Texas "Pot Roast" aka Fake Brisket

My local grocery store (as I presume most local grocery stores do) likes to sell cuts of meat with random names, forcing the buyer to figure out how exactly to cook it. One cut of meat they used to sell is the London Broil. Luckily, London Broil is actually a cooking method, so it was pretty easy to figure out how to cook this (marinate overnight, grill to medium-rare, slice thin across the grain).

Recently, however, they've started selling something called the Texas Broil. As far as I can tell, it's just a larger cut of the London Broil. The description on the packaging says "Chuck Arm Roast", but last time I checked, cows don't have arms, and the chuck is part of the shoulder.

Chuck is usually a tough meat, calling for the London Broil treatment (cooking it medium-rare keeps it from getting to tough, and thinly slicing across the grain keeps the muscle fibers short, also reducing toughness) or the pot roast treatment (i.e. braising). But that word Texas kept jumping out at me. Texas folk don't care about anything with London in the name, and they certainly aren't going to waste a nice chunk of beef by braising it. Then the idea hit me: smoke it! If I pretend the chuck is a brisket I'll get the tenderness and Texas-ness I'm looking for.

Texas "Pot Roast" aka Fake Brisket
  • 1 chuck roast (1.5 lbs)
  • 1/4 cup paprika
  • 1/4 cup chili powder
  • 2 Tbsp. garlic powder
  • 2 Tbsp. onion powder
  • 1 Tbsp. kosher salt
  • 1 Tbsp. cracked black pepper
  • 1 Tbsp. sugar
  • 2 Tsp. cayenne pepper
  • 1 c. apple cider vinegar OR good quality beer
  • 2-3 tsp red pepper flakes
  • several cups mesquite or hickory chips
Mix together the paprika, chili powder, garlic powder, onion powder, salt, pepper, sugar and cayenne pepper until thoroughly blended. Pour about three-quarters of it onto the brisket, rubbing onto every side and into every nook and cranny.

Prepare your smoker or grill for smoking. When it's ready, smoke the steak for at least 6 hours. If you are in a hurry you can get away with 4 hours, and if you have more time it could go up to 8. Mix some of the leftover rub with your vinegar or beer and red pepper flakes, and mop the meat with it about once an hour.

After 4, 6, or 8 hours in the smoker, you will hardly believe this used to be a tough piece of pot-roast. It will be fork tender, smokey, and delicious!

Friday, May 28, 2010

Chocolate Chip Banana Nut Bread

I love banana nut bread. With a passion. I make it so much that I got tired of searching the internet for a recipe every time I had a couple of bananas about to go bad, so a while ago I pulled out my copy of Shirly Corriher's Bakewise and created my own recipe. And it's pretty freaking amazing, if I do say so myself.

Background information

First of all, a little lesson about bananas. Normally when one eats a banana its skin is a nice bright yellow, its fruit is firm and off-white, and it's got a nice banana flavor. These make sucky banana bread. They are about 25%  starch and 1% sugar (by weight), and full of nice healthy cell structures. This make for a tough banana bread that's not very sweet and with an undeveloped, non-homogeneous flavor.

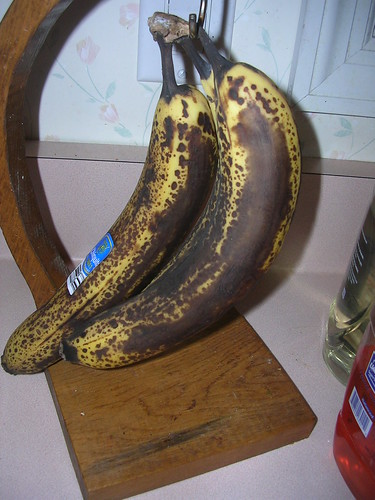
What you want are bananas like these:

Very ripe banana


Actually, those are a little less ripe than I normally use (you can still see yellow), but I was craving banana bread and couldn't wait any longer. Good clue that your bananas are ripe enough? You try to peel them and this happens instead:

Very ripe banana


Yeah that's right, it split clean off.

What makes these bananas so different than their out-of-hand cousins? When bananas ripen, their cell walls break down, converting nice firm bananas into squishy puddles of banana guts. As these walls break, their contents spill out, and previously-separated chemical compounds are combined, joining into more and tastier compounds. (Call me crazy, but I tend to find that an overripe banana tastes more like banana than ripe one). Another important change, especially when making cake (technically, banana bread is cake, not bread), is the conversion of starch to sugar. Starches, as we've very briefly touched on before, are long chains of sugars. During ripening, enzymes in the banana break down these long chains into their individual sugars, greatly increasing the sweetness of the fruit, while decreasing the cake-toughening starch. It goes from 25% starch, 1% sugar to 1% starch, 20% sugar (the rest of the sugar is used as energy for the process). Yum!

Enough with the science, onto the recipe!

Chocolate Chip Banana Nut Bread
  • 1/2 stick (4 Tbs; 2 oz) butter
  • 3/4 cup white sugar
  • 1/4 cup brown sugar
  • 2 eggs
  • 1 tsp vanilla
  • pinch salt
  • 3 super duper ripe bananas
  • 2 tsp baking powder
  • 2 cups all purpose flour
  • 1/4 cup milk (usually)
  • 3/4 cup walnut pieces, toasted and cooled (pecans work as well)
  • 3/4 cup regular chocolate chips (lower to 1/2 cup if using mini chips)
I like to follow the basic creaming method for my banana bread,  adding the bananas in between the eggs and flour. For those of you who don't watch quite as much Good Eats as I do, here's the basic method:

  • Beat the butter with the sugar over low speed until the butter is basically obliterated and the sugar is nice and fluffy (this is called the creaming step, hence the name of the method).
  • Add eggs one at a time, making sure you thoroughly incorporate the last one before you add the next one.
  • I like to add my salt and vanilla after the eggs, to insure they are nice and blended.
  • Add bananas one at a time; you should have no problems getting these babies to blend.
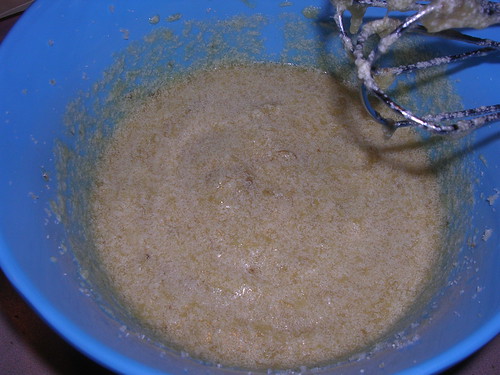
  • At this point you might be saying to yourself "oh noes, why does my batter look terrible?!?!"
Broken emulsion

  • Don't worry about that, you haven't done anything wrong. The bananas just contain too much water, and your emulsion broke. Flour to the rescue!
  • Add flour, one cup at a time, and blend thoroughly, but not more than necessary. Some sciency chefs cringe at using power tools here, because it can create too much gluten, causing your bread to be chewy. I don't know if it's the high sugar or if there's something in the banana, but I've never had problems with tough banana bread. Just don't overmix and you should be fine.
  • Oh, I also like to add in 1 tsp baking soda as you add each cup of flour. That way it gets blended together and you don't have to go to the trouble of sifting it first.
  • If, while adding the flour, the mixture becomes too thick to mix, add the 1/4 cup of milk. I don't usually have a problem and just add it at the end. Very rarely, you won't even need it at all, it just depends on how much moisture your bananas contain. At the end of all this your batter should be the consistency of cake batter.
  • Lastly, stir in your chocolate and nuts. Toasting the walnuts is imperative, as it makes them taste so much better
Pour the whole thing into a well-greased bread pan and bake at 300 for 50 minutes. I've found that if you bake it at the traditional temperature of 350, it browns too fast and is hard to cook the middle.


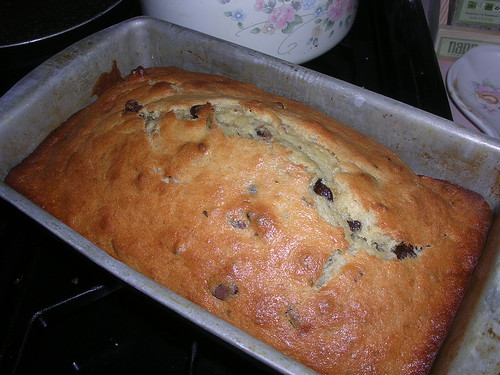
OMG so good
Banana bread


One last anecdote before I go to polish off the rest of this batch. My dad claims he does not like chocolate chips, so one time I made a double batch and added chocolate chips to only half. I noticed to very weird things: firstly, despite his claim, my dad ate more of the chocolate kind than regular, and secondly, the chocolate chip banana bread tasted more like banana than that without chocolate. There must be something in the chocolate that brings out the flavor of banana to a huge degree. Just some food for though.

    Monday, May 24, 2010

    Savory Smoked Chicken Tart with Shallots and Apricots

    See this post for a little background on this dish.

    Morning of (or night before) Dinner:
    • 1 lb chicken breast, trimmed of excess fat
    • 1 shallot, sliced thin
    • 3-4 dried apricots, sliced thin
    • 3/4 c. good quality soy sauce
    Place all ingredients in zip top bag or other water-tight container. Marinate at least 4 hours, or overnight.

    Two hours (or more) before dinner:
    • 7oz shallots, sliced thin (I just used the rest of my half-pound bag)
    • 1 cup-ish dried apricots, sliced thin (I counted out 20)
    • 1/2 c. marsala wine
    • 1/2 c. balsamic vinegar
    • 1 clove garlic, minced (dried is fine)
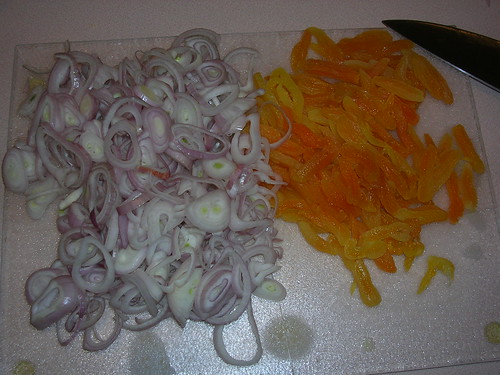
    Place all ingredients in zip-top bag and marinate for at least an hour. Here's a superfluous shot of my sliced ingredients:

    Shallots and apricots


    Pro tip: If you, like me, are too manly to be seen crying in the kitchen, cut your shallots near an open flame. This won't work if you're crying because you've cut your self; in that case you've got no options but to man up.

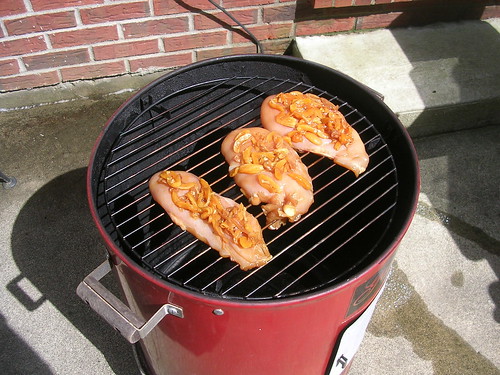
    Right about now is a good time to start smoking your chicken. I smoked mine for about an hour and a half using hickory wood. If you like a milder smoke flavor, apple or pecan wood work well with this dish as well. As you can see I added the shallots and apricots from the chicken marinade to help keep the chicken juicy and flavorful.

    Smoking chicken


    For those of you not fortunate enough to have a smoker, you can grill the chicken along with a foil packet filled with wood chips. If you don't have a smoker or a grill, then have a nice little cry, then cook the chicken in the oven instead.


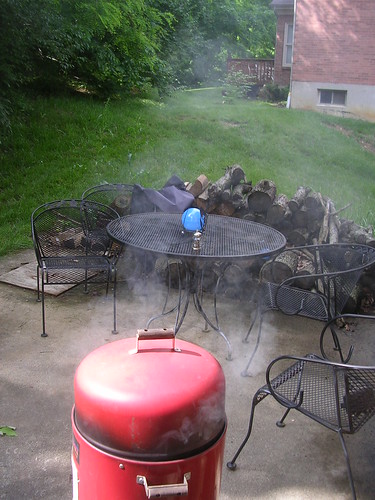
    Mmmm smokey goodness

    Smoking chicken


    Yummy Herb-Garlic Crust
    • 1-1/2 c. all purpose flour
    • 1/2 c. corn meal
    • 2 tsp garlic powder
    • 2 tsp onion powder
    • 1 tsp oregano
    • 1 tsp thyme
    • 1/2 tsp rosemary
    • large pinch salt
    • 1/2 c. butter
    • 1/2 c. (ish) very cold milk
    Disclaimer: if you already know how to make pie crust then don't listen to this part. If you don't know how to make pie crust then say a little prayer before proceeding. It's not at all hard to do, I just never do it and I'm not very patient.

    Thoroughly mix together all dry ingredients, then cut in butter until it's nice and pebble-y. Add milk a small bit at a time and stir together. Keep adding until the crust just holds it's shape when pressed together. Flatten into a disk shape, wrap in plastic wrap and put in the fridge for about an hour.

    Almost dinner time!!!
    • Shallot/apricot mixture, drained of excess liquid
    • Yummy garlic-herb crust
    • 8 oz. goat cheese, softened
    • Smoked chicken breast, diced
    Saute your shallot/apricot mixture over medium-low heat. It'll be hard to tell how cooked everything is since they will be stained a nice shade of black, but you want them to soften and for the harsh vinegar smell to mostly dissipate. (Don't test this by sticking your head over the pan and sniffing. A wise man learns from other people's mistakes.)

    Meanwhile, roll out the dough on a floured work surface to a nice 1/8th inch to 1/4 inch thickness, in a roundish shape. Mine ended up being too dry, so I pressed it into a tart pan instead. The key to making mistakes is to make it look like you planned it that way. Spread the crust with a thin layer of the goat cheese. If you are having trouble spreading it, warm the crust in the oven for a minute (you did preheat that to 350, didn't you?). Set the cheese on the warm crust to let it melt a bit and it will spread like butter.

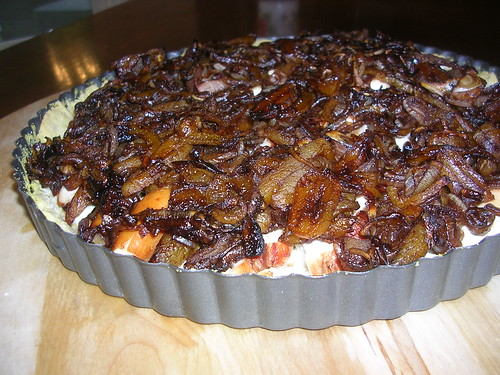
    Add the chicken next, and top it all off with your shallots and apricots. Pop it in the oven long enough to warm everything through and cook the crust (should be no longer than 10 minutes). It should look like this:


    Money shot! The dark color is poor lighting; it wasn't at all burnt.

    Savory Smoked Chicken Tart with Shallots and Apricots


    It's salty, sweet, savory, chewy, crunchy, tangy, smokey, fruity, creamy, and most importantly: total yumsters. Enjoy!

    Friday, May 21, 2010

    Musings: Shallots and Apricots

    There's this awesome site called FoodieFights. Check it out.

    This week's episode is Battle Shallot and Apricot, and I went through the grueling selection process and was selected as a contender for this week's battle. (AKA: I put my name in the hat and they picked it. They pick six names every week. This week, I was in a pool of... six people.)

    Anyways, shallots are not something I'm that comfortable working with, because, at least around here, onions are SO MUCH CHEAPER. Last November I bought a fifty pound bag of onions for eleven bucks. Fifty! Eleven! (In case you are wondering, it was gone by March). Compare that to the 1/2 lb bag of shallots I found.

    It was one of only two bags in the store, and it cost me two dollars. Needless to say, I don't work with shallots... ever.

    The other ingredient is something I've worked with often. Around Ohio we have apples, apples, apples, apples, and corn, but no apricots. In fact, I was able to find pineapple, kumquat, passion fruit, and even some fruit I've never heard of, but they didn't have one single fresh apricot.

    So long story short, this is going to be an interesting challenge. 

    My first thought was to try and concoct some sort of dessert. It would be challenging to people's palates, but it shouldn't be impossible; shallots do have a lot of natural sugars. This would be a good application for an ice cream, though if it didn't turn out perfectly it would taste terrible. It's also not something that comes across well to judges who aren't actually eating the final product. I can say "I swear this tastes good" all I want, but what it really comes down to is gut reactions.

    My next thought was to do something with smoked apricots but it's raining here and I don't feel like getting wet. Plus I don't think dried apricots would really take to smoking, and onions when smoked pretty much disappear.

    I think I'm going to go with a savory tart-type application, which is going to be interesting seeing as how flour and I don't always get along. The challenge for me to keep in mind is that the apricot and shallot, two ingredients used to being kept in the background, need to be the star attractions. I lucked out a little bit on the sweetness angle, though, because I seem to have purchased the least sweet apricots I've ever had. I'm still mulling over what exactly I'm going to do (nine times out of ten I don't finish a recipe idea until it's actually on the table), but I think it will be good.

    Battle On!

    Scallops Linguine with Bacon, Mushrooms and Peas in a Mustard Cream Sauce

     So the name doesn't roll off the tongue but this is still a pretty tasty dish.

    Linguine
    • 6 oz Linguine
    As you prepare the rest of the food boil the linguine in your biggest pot with a large pinch of water. You know how to cook pasta, right?

    Scallops et al.
    • 2 strips bacon, cut into lardons (tiny little strips)
    • 1/4 white onion, diced
    • 3-4 large button mushrooms, diced
    • 6 oz bay scallops
    • 1/4 cup frozen peas (fresh or frozen; not canned)
    • Salt and pepper
    Saute the bacon in a stainless steel pan. (Ok, you can use non-stick, and I won't tell if you do, but technically your sauce won't be as tasty.) When it's nice and crispy, drain onto paper towels. Drain excess grease and add the onion and mushrooms; saute until soft. Next add the scallops; cook for about 30 seconds to a minute then add the peas, salt and pepper. As soon as the scallops are cooked through (it won't take long), add the bacon back to the pan and move everything to a bowl while you make the sauce.

    Mustard Cream Sauce
    • 1 cup white wine
    • 2 cups chicken stock (I cheated here and used a white wine- and herb-infused chicken stock)
    • 2 Tbsp whole-grain mustard
    • 2 Tbsp parmesan cheese
    • 2 Tbsp heavy cream
    Deglaze the pan with the white wine, scraping all the yummy bits off the bottom. Add the stock and keep over medium-high heat until reduced to about 1/3. It should thicken to coat the back of a spoon. Add the mustard, cheese, and cream, and stir over heat until well blended.

    Toss together the linguine, sauce, and scallop mixture, and enjoy.

    Tuesday, May 11, 2010

    Food Knowledge: High-Fructose Corn Syrup

    Mother's Day was this weekend, and all my mom wanted was grilled hot dogs and hamburgers. Since it's "her" day, I had to hide my disdain as I did her bidding.

    Grilled Hot Dogs and Hamburgers
    • Hot dogs
    • Hamburgers
    • Hot dog and hamburger buns
    Grill the hot dogs and hamburgers. Put them on their respective buns. Eat. Yay.

    Exciting, I know. With that out of the way let's talk today about high-fructose corn syrup (HFCS). There's been a lot of hype lately about whether or not this stuff's good for you, and frankly a lot of arguments on both sides are utter nonsense. The pro-HFCS side make it out to be this harmless, all natural substance that we should eat as much of as possible (SweetScam, run by Center for Consumer Freedom), and the anti-HFCS side thinks that we should completely ban HFCS because if you eat one bite of it you are poisoned for life (THE BAN OF HIGH FRUCTOSE CORN SYRUP IN THE U.S Facebook Group). Interestingly, if you want to find a lot of solid pro-HFCS arguments, check out that second link and look at the discussions.

    Warning: The following contains some sciencey words

    As a degreed chemical engineer and a wannabe professional food scientist with an unhealthy appetite for food politics, I'm really tired of hearing all the junk there is out there, especially when it's so easy to find out the truth.

    Table sugar is a natural (ish) substance which is found in the juice of beets and sugar cane. Once you spin out the juice (molasses) you get plain white sucrose, a disaccharide. This is what comes in 5-lb bags in the grocery store. Once this sugar hits an acid (like that found in your stomach), it inverts, breaking apart into its constituent monosaccharides: fructose and glucose in a 50/50 mix. Sucrose has an energy density of 4 calories per gram (for comparison, fat is 9 cal/g).

    High-fructose corn syrup is substance made from good ol' American corn. Natural starches (polysaccharides, long chains of monosaccharides) are coverted enzymatically (that means with enzymes, little biological catalysts) into glucose (this is known as corn syrup), which are then converted to fructose. See what's happening here? The fructose is then added back to pure glucose to reach a ratio of 55/45 or 42/58 fructose/glucose. Since it's made up of the exact same stuff, HFCS has an energy density of 4 cal/g.

    So what is the difference between the two? Not much. HFCS either has a higher or lower percentage of fructose compared to table sugar, but chemically, the glucose and fructose made from corn are exactly the same as the glucose and fructose made from sugar cane or beets. They are digested the same, and they taste the same.

    So... what?

    Who knows for sure why people choose to fear the wonders of modern chemistry. Despite our high-tech high-science high-society, a large portion of people have decided that science is not to be trusted, and go out of their way to make flawed arguments to support their point. Here are some of the worst and most often repeated arguments (these are all arguments I have heard myself, I swear I'm not making this up):

    High fructose corn syrup causes diabetes.  Not according to the American Diabetes Association. Obesity, of which overconsumption of sugars is a cause, is a risk factor for diabetes, but sugar, specifically HFCS, does not "cause" diabetes anymore than bacon cheeseburgers do.

    More calories are consumed through HFCS than any other energy source. I've seen this claim made before, but I can't find any data to support or refute this fact. Let's assume, for sake of argument, that the statement is true. So what? The reason people state this "fact" is because they want you to believe that HFCS is impossibly high in calories, but as I've shown, it's simply not the case. If it's true that people get more calories from HFCS it's simply because they are eating more HFCS. It's not rocket science, people.

    HFCS is the cause of our obesity epidemic. Actually, consuming more calories than you are burning is the cause of our obesity epidemic. If we instantly switched from using HFCS to sugar, we would still be exactly as fat as we are now.

    HFCS is only used because of corn subsidies. You forgot sugar tariffs. Go lobby your congressman. Or alternatively, thank them for artificially lowering corn prices. Whatever floats your boat. Point is, there's no conspiracy here, it's straight economics.

    HFCS doesn't satisfy your hunger the same way as sugar, so it forces you to eat more. First of all, it's your fault if you eat to many doughnuts, not Krispie Kreme's. Secondly, there's no evidence that HFCS affects satiation any differently than sucrose (source, and also a good primer on the issue of HFCS in general).

    But what about study X that proves that HFCS does Y? First of all, if you haven't read the primary source yourself, I don't believe you. Secondly, one study doesn't prove anything, especially if it's not repeatable by other scientists. A lot of studies have fatal flaws that aren't apparent by reading the abstract, and science correspondents don't always favor accuracy over attention-grabbing headlines.

    Conclusion: So.... what (again)?

    So you may find it unusual that a recipe blog would discuss an ingredient that's not available for the home cook. But the principals we've applied here can be applied to any number of more-easily attained ingredients often shunned for dubious reasons by health conscious or eco-conscious individuals: white flour, non-organic food, MSG, trans fats, fast food, salt, tuna, and many other perceived evils. It's great if you want to be health conscious, but don't fall for the hype. And don't be scared of your food; you'll get more out of it if you enjoy it.
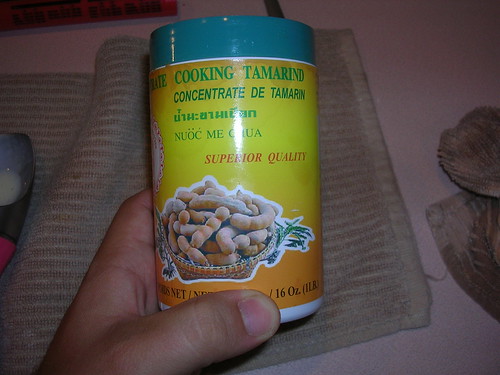
    Wednesday, May 5, 2010

    Leftovers: Pineapple, Chorizo, Coconut Milk

    So what do you do when you have extra ingredients from recipes? You make more recipes! These aren't especially creative, but I did actually make them and they were all kinds of tastey.

    Chorizo Tacos
    • 1 link of chorizo
    • 1-inch slice of onion
    • 1/2-inch slice of pineapple
    • 2 corn tortillas
    • Cilantro, lime, and chipotle flavored Tabasco sauce for garnish
    This is a great, quick meal for one, using leftovers from Tacos al Pastor a la Ohio (It's what I had for lunch, in fact). Keep the pineapple core in tact for now, and grill the chorizo, onion, and pineapple. (I like to stick a toothpick through the onion to keep them from falling apart.) Chop up into bite-sized pieces, place on the tortillas, garnish, and enjoy.

    Coconut Pudding
    • 2 c. coconut milk 
    • 2 Tbsp cornstarch
    • 1/2 c. sugar
    • 4 egg yolks
    • 1 tsp vanilla
    In a small bowl, whip the egg yolks until smooth. Then in a 1-quart saucepan over low heat, stir the milk, cornstarch and sugar until the mixture starts to bubble and thicken. It may thicken unevenly, so you may want to use a whisk to keep it from being lumpy. Add a whisk-full of hot milk mixture to the eggs and blend. Continue adding the milk to the eggs until you can feel the heat through the bowl. Next, pour the eggs into the milk and continue stirring over low heat until blended and smooth. Take off of heat and stir in the vanilla.

    You can stick this in the fridge and wait until it cools down... but I couldn't wait that long and just ate it warm.

    The beauty of this recipe is that it's easily divisible by 4 and you can base the measurements off of how much leftover coconut milk you have left. I used 1/4 can earlier today to make this great recipe from TheFoodInMyBeard, so I reduced everything by 1/4. And I didn't have to get out the calculator!

    Tacos al Pastor (a la Ohio)

    So there's this great Mexican restaurant where I live and... ok if I'm going to be honest, it's not exactly a great Mexican restaurant, but as far as fake Ohio-Mex goes, this is much better than any chains, and it's really close to me. Anyways, they make a dish called Tacos al Pastor that I love. It's very simple: spicy seasoned steak with pineapples and chorizo on a corn tortilla, served with a spicy, vinegary sauce on the side. Even though they use canned pineapple instead of fresh (bleh), it's one of the best dishes I've ever had at a fake Mexican restaurant. Here is my take on it, using pork in place of the beef.

    Marinade (Two Hours Before Dinner [HBD])
    • 1 1/2 lb pork or beef*, diced to 1/4 inch or thinly sliced
    • 1 jalapeño pepper, seeded and diced
    • 1/4 white onion, diced
    • 1/4 c. crushed pineapple**
    • 3 cloves garlic
    • 2 Tbsp white vinegar
    • 2 Tbsp chili powder
    • 1 Tbsp chipotle flavored Tabasco sauce
    • 1 Tbsp ground cumin
    • 3 whole cloves, toasted (or 1/4 tsp, ground)
    • 1/4 tsp ground cinnamon
    • Pinch of salt and pepper
    Place all ingredients (except the pork, obviously) into a blender or food processor and pulverize until you have a smooth, thin paste. If it's a little thick, add more vinegar a splash at a time. Marinate the meat with the paste mixture in a resealable plastic bag. Mine marinated for about 2 hours, which was plenty. You could leave it as long as overnight if you so desired.

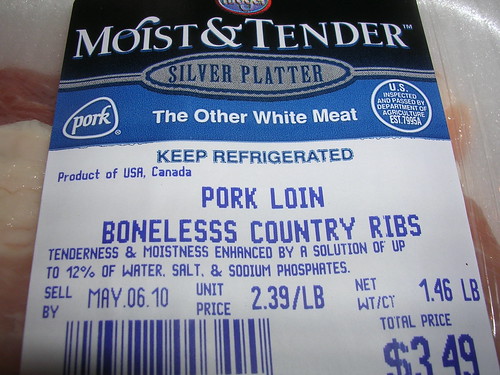
    *For the meat, I used one of my family's favorite cut of week-night pork, called the "pork loin country-style rib". I'm not really sure what it is, but it's part white meat, part rib meat, and 100% yummy. It's also pretty cheap. You could also use pork loin or beef loin.
    **Fresh pineapple is miles ahead of canned, but if you can't get fresh, get the kind that's in juice, not the syrup. I actually ended up using canned for the marinade, because I had a little left over in the fridge and didn't feel like cutting up the real pineapple just yet.

    Everything Else (0.5 HBD)
    • 1/2 fresh pineapple, peeled, cored, and diced to 1/4 inch
    • 2 links of chorizo sausage
    • 10 corn tortillas
    • Cilantro, lime, and diced white onion for garnish
    I first grilled the chorizo on the outdoor grill to give everything  a nice smokey flavor. (While you've got the grill fired up, grilled corn on the cob is a nice side dish for this meal).

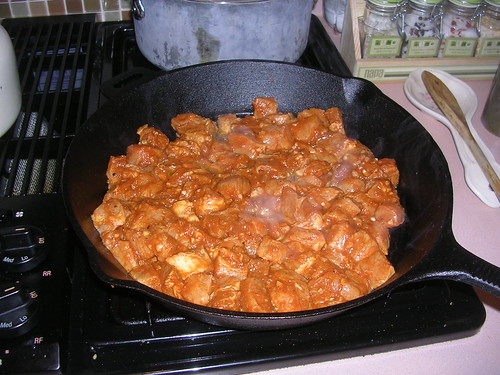
    My original idea was to sauté the meat along with the marinade, but once the onion and pepper hit the pan they let out all their juice, which ended up sort of stewing the meat. It turned out great, but if I did it again I would first drain the meat in a colander and try and get as much marinade off as I could. When the meat is about 75% of the way to completion (five minutes or so, depending on your dice, your pan, and your heat), add the pineapple and chorizo, stirring to meld all the flavors. You don't really need to cook the pineapple or chorizo, so as soon as your pork is done you are ready.

    To serve, layer up a spoonful of the meat and pineapple mixture onto a corn tortilla. Top with cilantro and onion, adding a squeeze of lime if you like. Enjoy.

    Update: Now with pictures!

    Unfortunately I got a little rushed at the end and forgot to take pictures of the final product! I figured I could just take pictures of the leftovers but... there weren't any. The last picture is a depiction of just how much water sweated out of the marinade once it hit the pan. I've had this problem before with minced onions; they are relatively dry at room temperature, but once they are heated they just melt and then you steam whatever you are trying to cook.


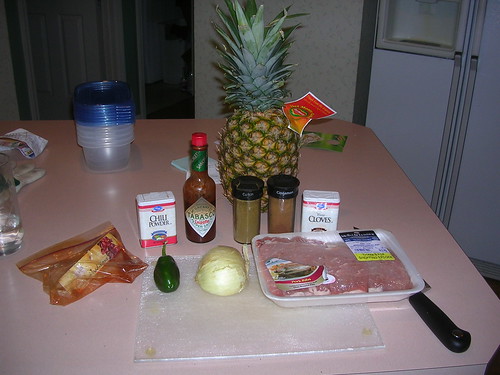
    Raw ingredients
    Pork Loin Boneless Country Ribs
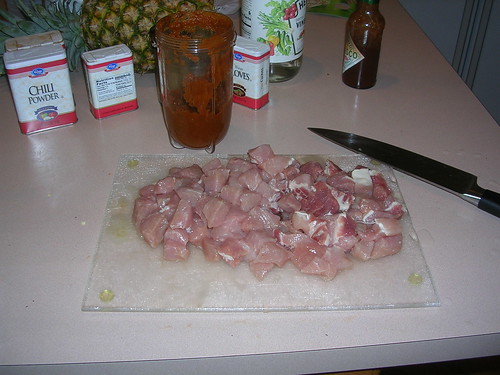
    Everything chopped up
    Meat cooking
    Chopped chorizo and pineapple
    Cooking water

    Friday, April 30, 2010

    Mmmmm... Buttered Steaks

    For my first post ever I'll do what I plan on doing in most every post: describing what I had for dinner last night.

    For the most part, I'm kind of a steak purist. The only thing I put on the steak before it goes on the grill is coarse salt and pepper. Grill over as high a heat as possible, turning only 3 times: one flip and two 45 degree turns for pretty grill marks. Medium rare. Yum.

    My family, for the most part, are not quite the purists I am. They like their slabs of beef to have flavors other than just... beef. I've done rubs and marinades, which are the same things I do for other cow products. If I want to eat a t-bone, I don't want it to remind me of the way I treat a bottom roast.

    The solution I've come up with is flavored butters. Mix the butter together with herbs and spices, and as soon as the steak comes off the grill, dot it with a pat of butter. As you let the steak rest it gets a marinade in yummy buttery flavory goodness. (It also is a nice insurance policy if you overcook your steak. The added fat adds back some of the moisture and richness lost by cooking a steak past medium.)

    Last night's recipe was Garlic-Cumin Herb Butter. All measurements are approximate, because I don't really measure stuff... ever.
    • 4 Tbsp unsalted butter, room temperature
    • 2 cloves garlic, roasted in the oil until super mushy and carmelized
    • 1 tsp cumin
    • 1 tsp crushed chipotle pepper or your favorite chili powder
    • 1/2 tsp dried oreggano
    • 1/2 tsp dried thyme
    • 1/2 tsp cracked black pepper
    In a small bowl, mix all ingredients together until thoroughly combined. Add about a tablespoon to the top of your favorite cut of steak, fresh off the grill. Enjoy.